Firmware Setup
This chapter explains firmware options for your Ender 3 CNC conversion.
Supported Options
| Firmware | Notes |
|---|---|
| Klipper | Recommended if a Raspberry Pi or old laptop is available |
| GRBL | Standard CNC option, must purchase an ESP32/32-bit board |
Klipper Setup
-
Follow standard Klipper installation on your Raspberry Pi or Linux laptop. We recommend dw-0/kiauh to get started.
-
Copy a reference
printer.cfgfor the Ender CNC: - Make sure the stepper, endstop, spindle, and belt parameters are correct for your MCU
-
Make sure all motors are spinning correctly and settings are correct for your MCU
-
Test all axes manually before enabling motor power.
-
Configure homing and probe offsets for your spindle.
Example configs
- Version 1.1.x Ender MCU printer.cfg Original Ender 3
- Version 4.2.2 Ender MCU printer.cfg Ender 3 Pro
- Version 4.2.7 Ender MCU printer.cfg Latest Ender 3 pro
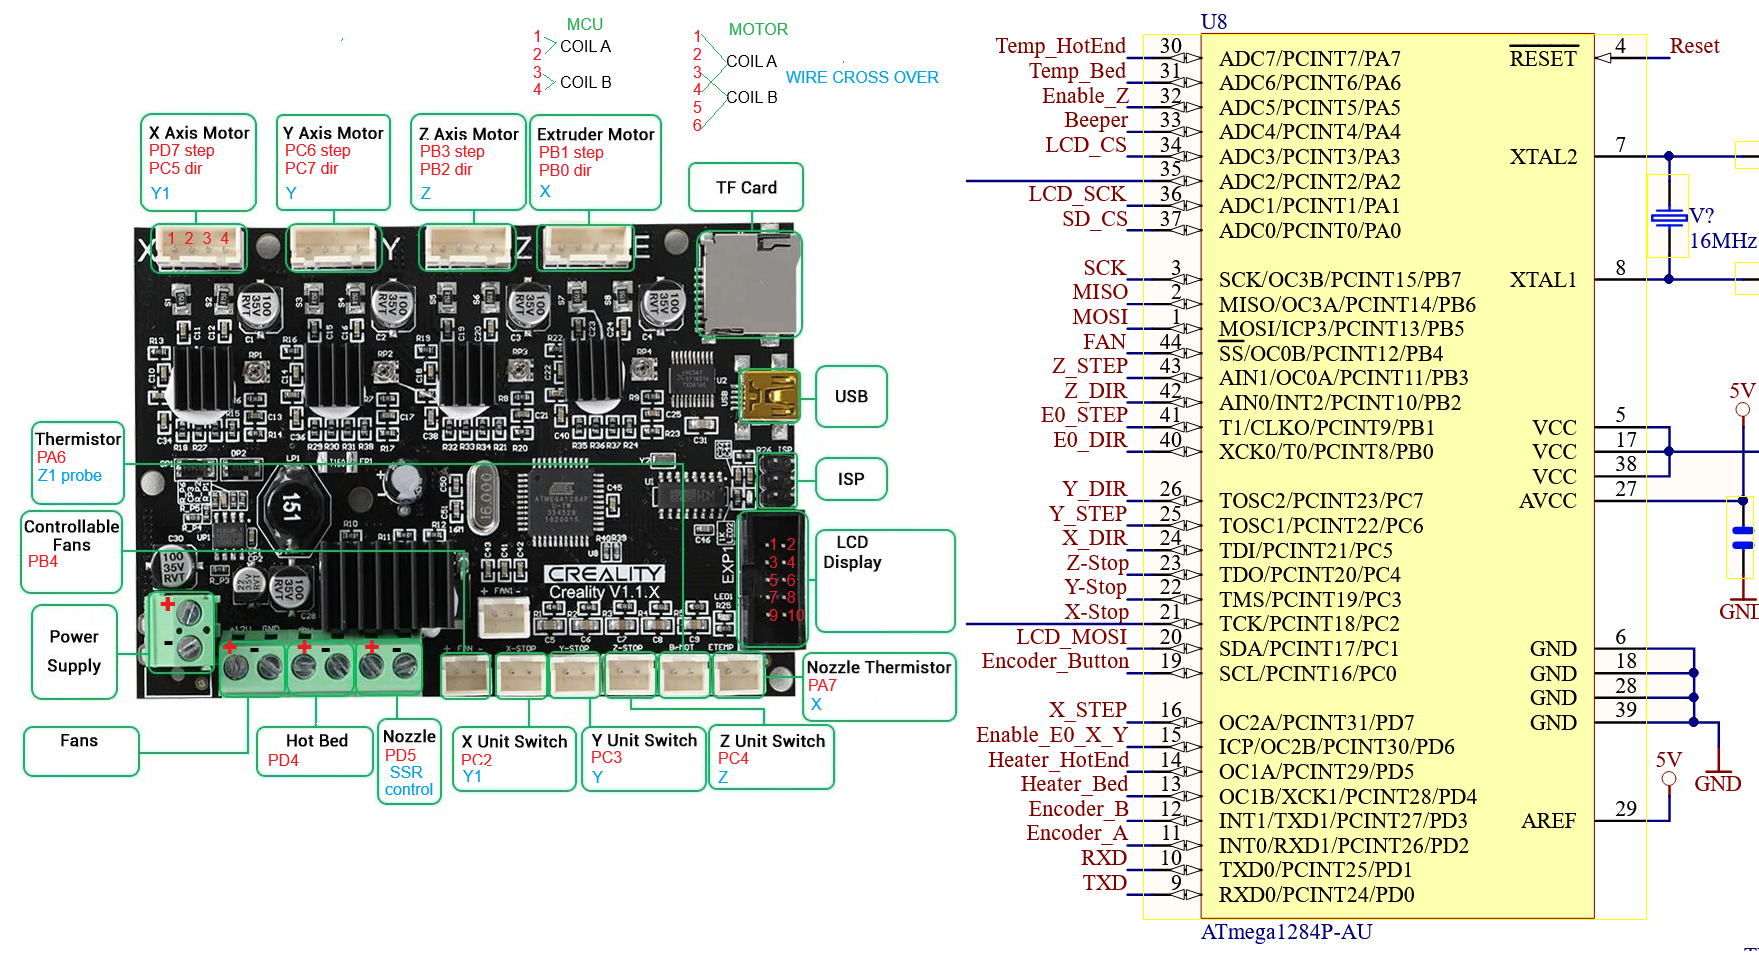
How to document your mainboard
Notice in the picture that the processor and motor has documented pins.
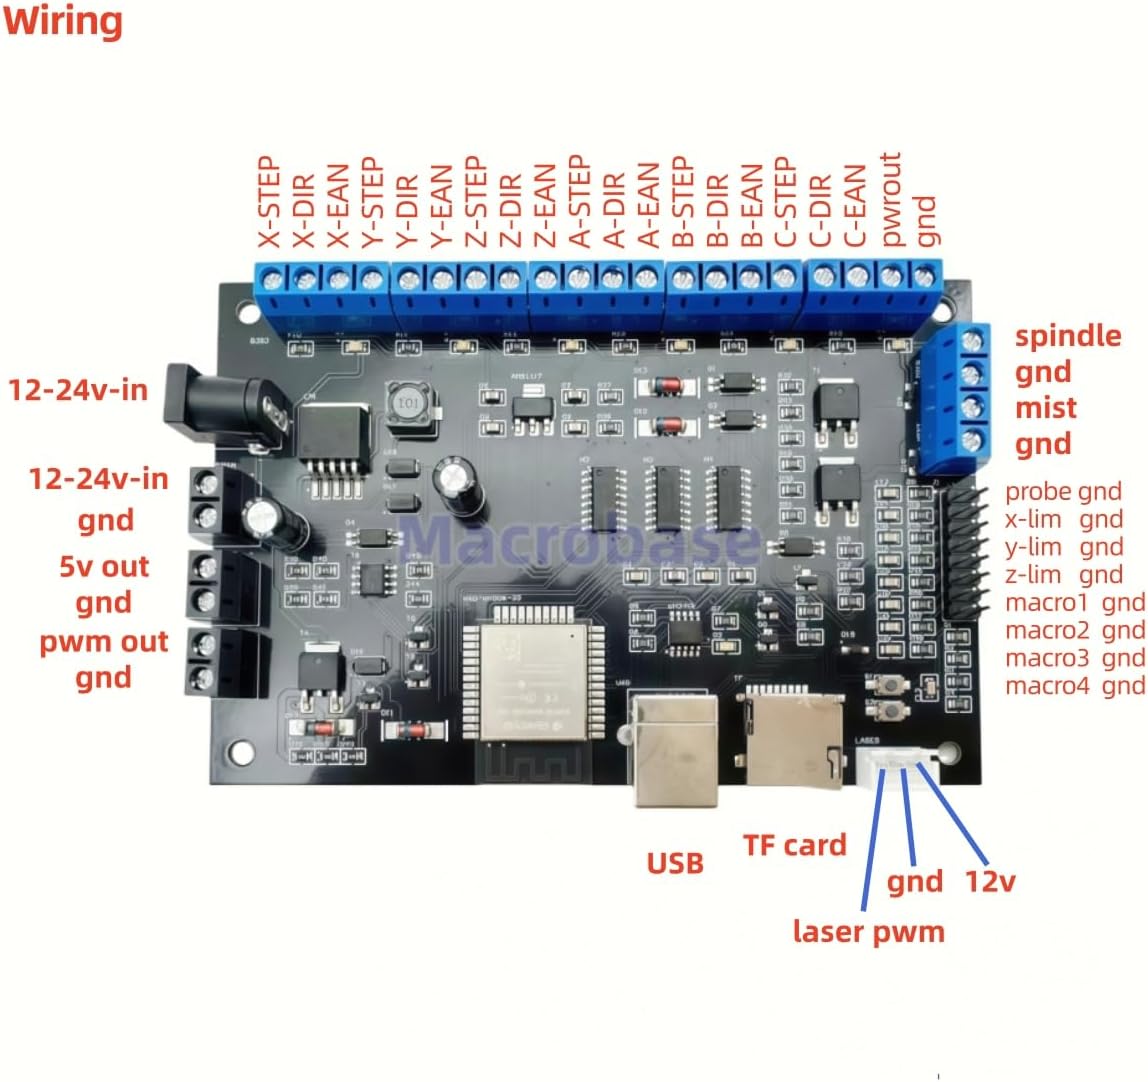
GRBL Setup / FluidNC
- Flash your GRBL-compatible board according to manufacturer instructions.
- Use the reference configuration for stepper settings, endstops, and spindle control.
- Test movement manually before running any G-Code.
FluidNC Setup
Typical GRBL CAM software
IMPORTANT NOTES
Don't let the magic smoke out!
Tip
Keep a backup of working firmware configuration before making major changes.
Warning
Never run motors at full speed during first test
Warning
Verify wiring because Creality motors have crossover wires.
Warning
Y axis has one motor inverted. Test Y motor without belts first.
Ready to Proceed?
You have now completed Ender3CNC build and you can now do Trouble Shooting or move onto Post Processing.